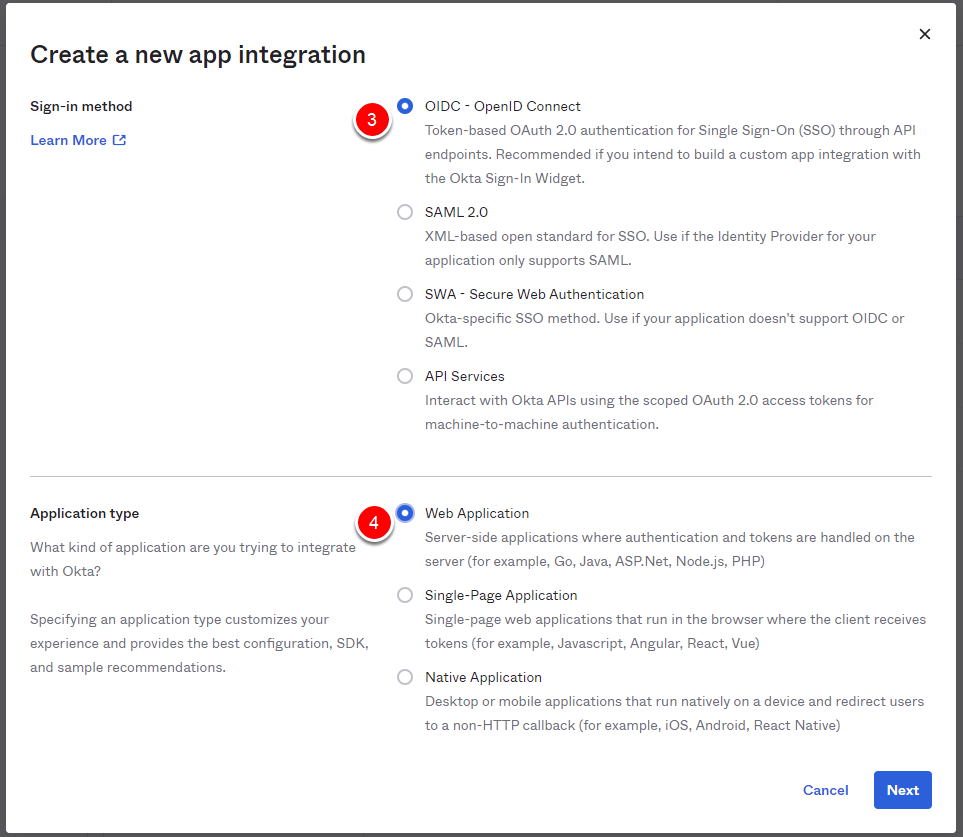
SSO OIDC Quick guide Okta

Below are screenshots to illustrate the steps required to connect URIports to Okta for the purpose of enabling Single Sign-On through OpenID Connect (OIDC).

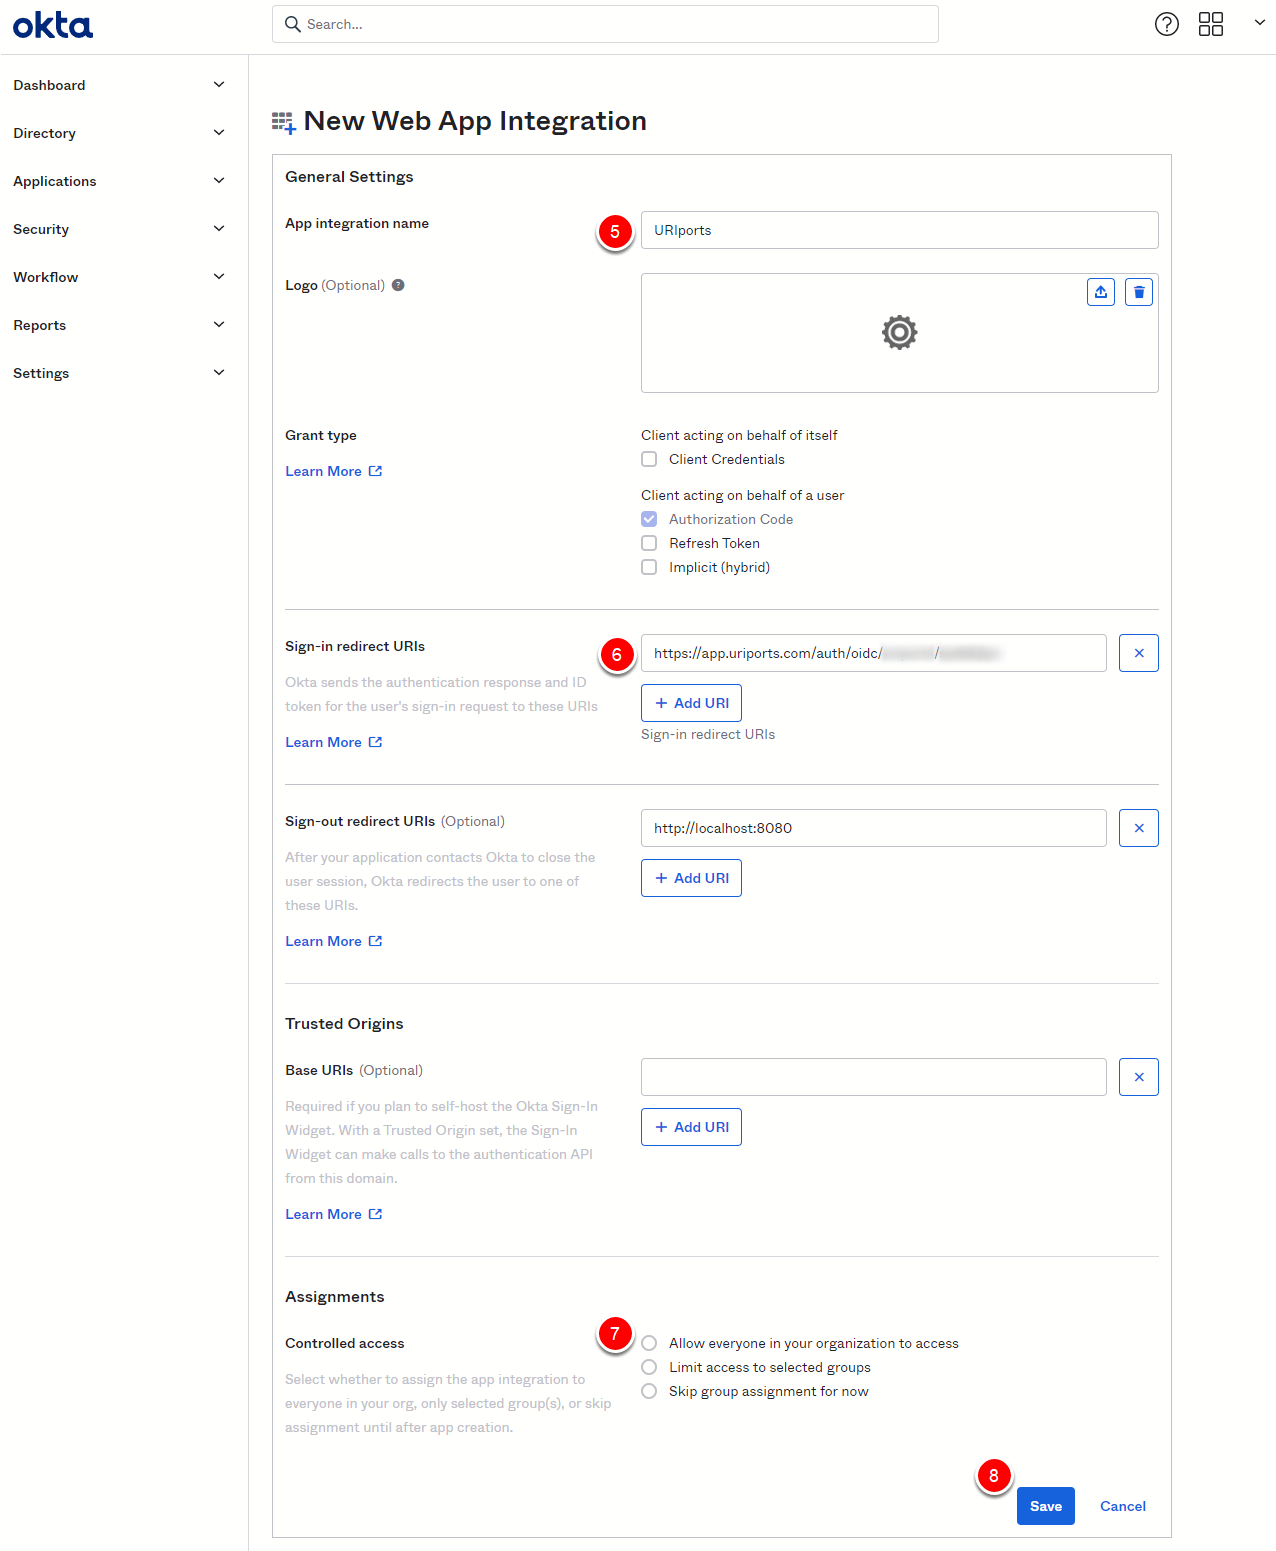
6. Paste the Redirect URI from URIports here
7. Select which users should have access to URIports
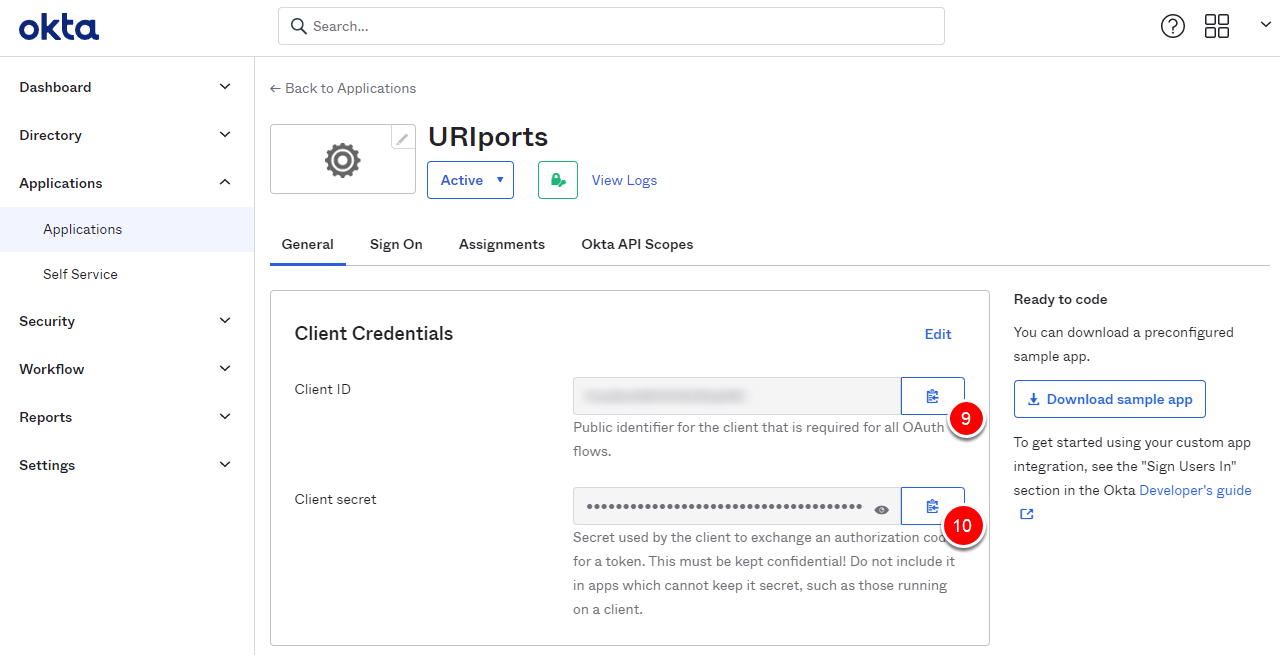
9. Copy the Client ID and save this value in URIports
10. Copy the Client Secret and save this value in URIports

12. Copy the Issuer and save this value in URIports as the Application URL
That's it!